Fashion design sketches are an important way to communicate clothing ideas before a garment is made. Whether you want to draw a dress, create an outfit collection, or explore a career in fashion design, learning to sketch can help you turn creative ideas into visual designs.
You do not need expensive equipment or advanced drawing skills to begin. A pencil, paper, references and an understanding of basic shapes are enough to start practising.
To draw a fashion design sketch, begin with a fashion figure or croquis, establish the pose, outline the garment, add construction details, and finish with fabric textures, shading or colour.
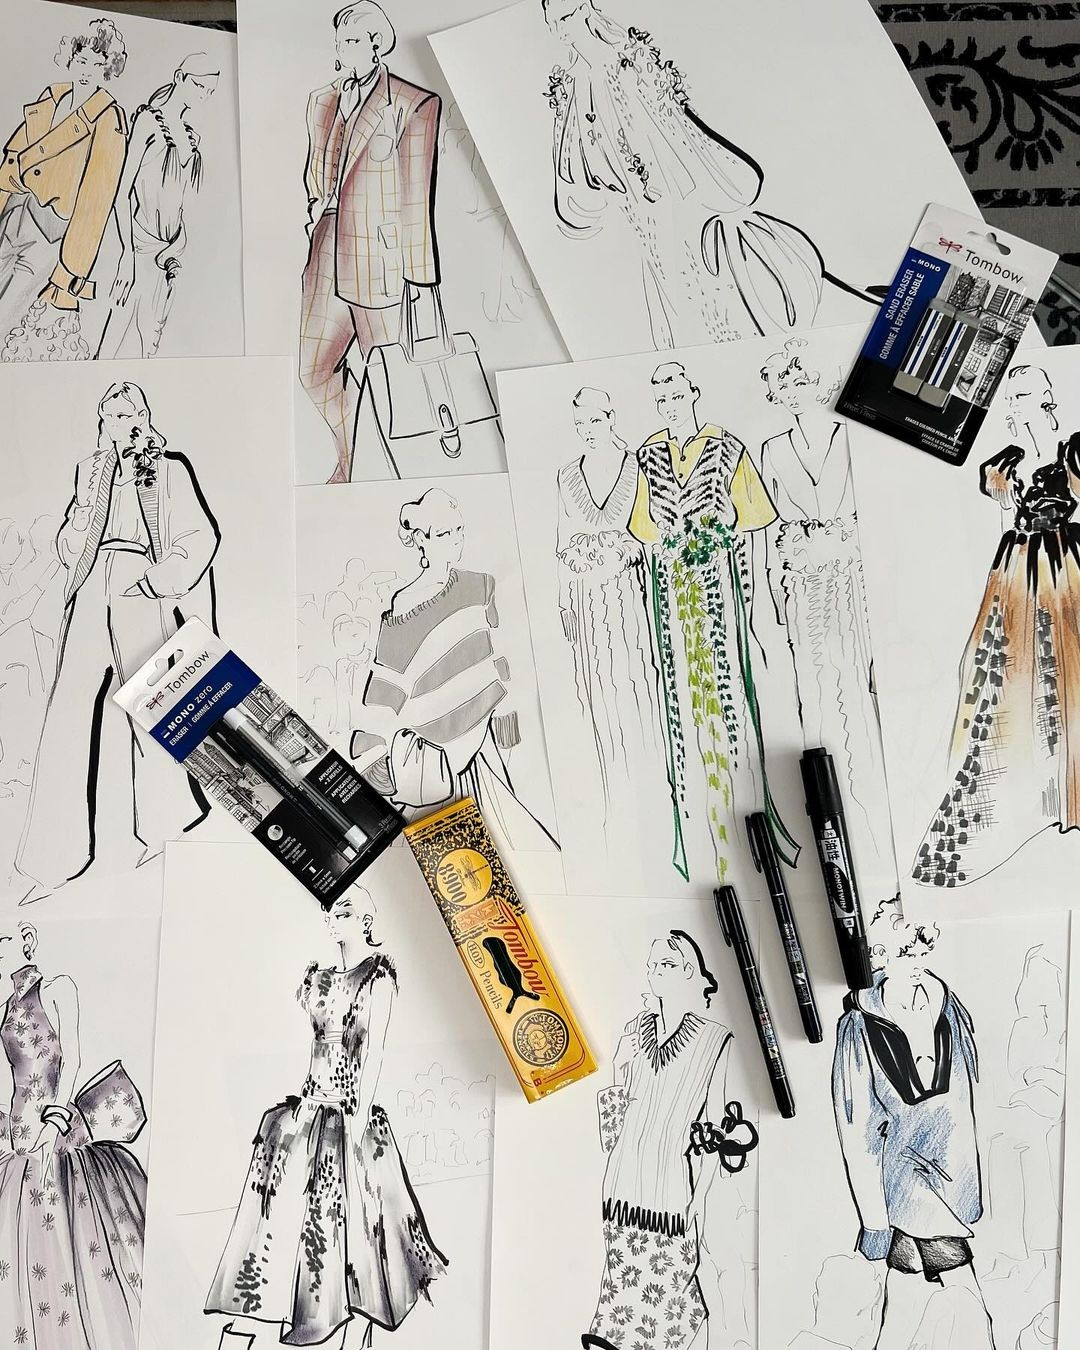
This guide explains fashion illustration, different types of fashion sketches, beginner-friendly drawing techniques, useful tools and exercises to help you develop your skills.
What Is Fashion Illustration in Fashion Design?
Fashion illustration is the visual representation of clothing, fashion concepts and style through drawing or other artistic techniques. It can communicate a garment's silhouette, colour, fabric, movement and overall aesthetic.
Fashion illustrations may be created by hand using pencils, markers and paints or digitally using drawing software.
The purpose of the illustration determines how detailed or expressive it needs to be. For example, an editorial illustration may emphasise mood, movement and artistic style, while a technical fashion sketch focuses on accurately communicating garment features.
Adobe's guide to fashion illustration explains these differences between expressive illustrations and technical flat sketches.
What Is the Difference Between Fashion Sketching and Fashion Illustration?
The terms fashion sketching and fashion illustration are often used together, but they can describe different stages or purposes of fashion drawing.
These are not rigid categories. A fashion sketch can be detailed, and a fashion illustration can be minimal.
Both help communicate clothing ideas visually.
Types of Fashion Design Sketches
Before learning how to draw, it helps to understand the different types of fashion design sketches and when each is useful.
1. Rough Fashion Concept Sketches
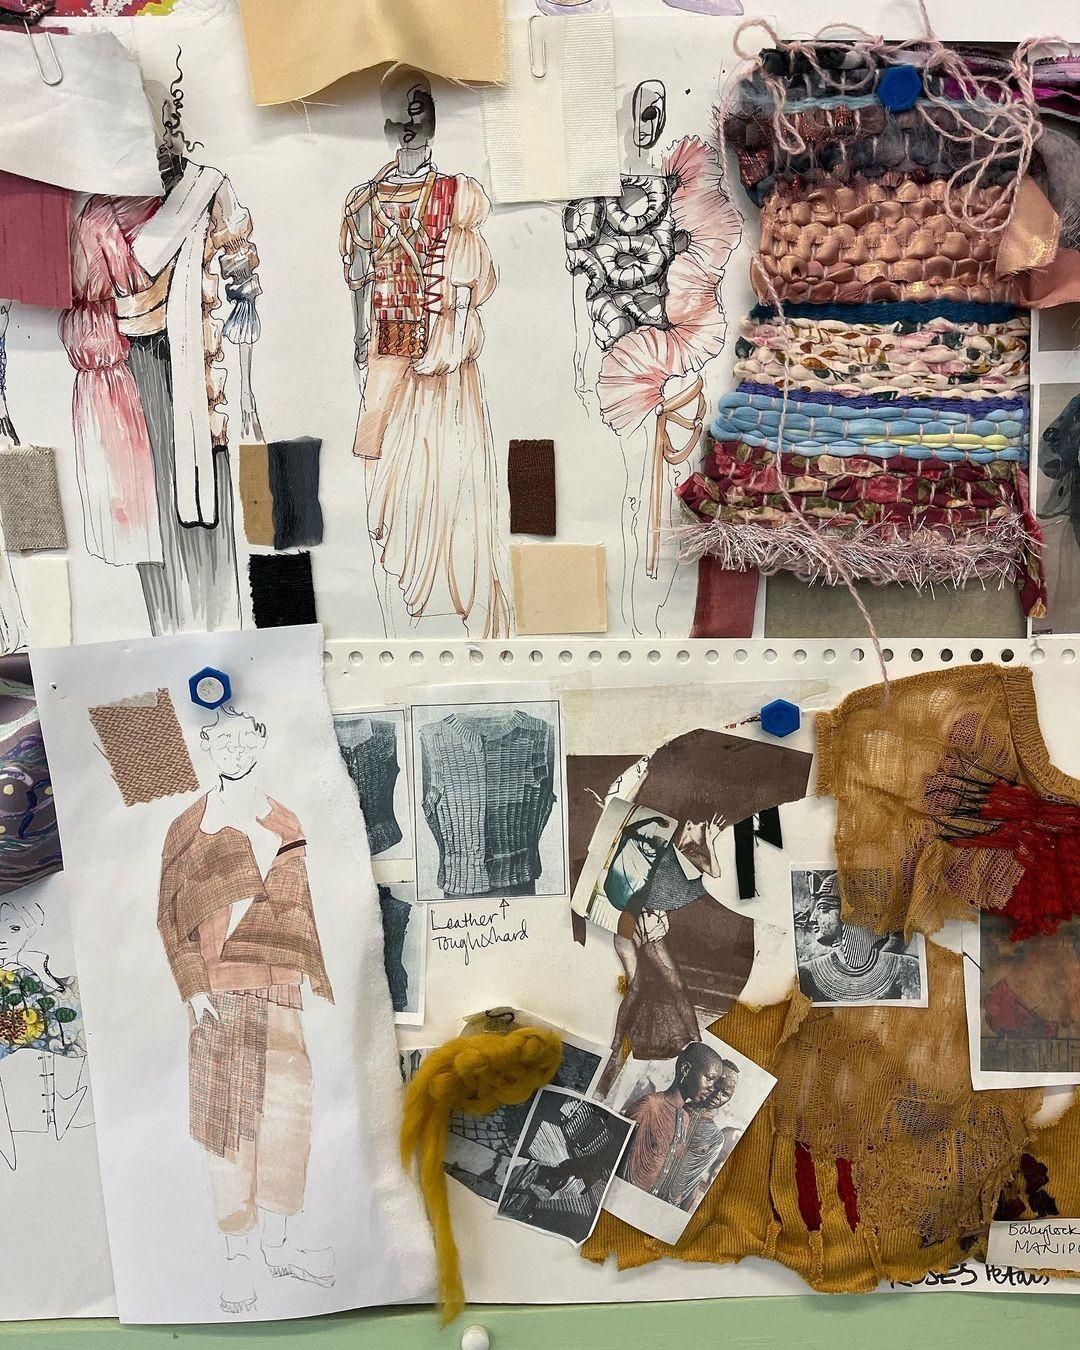
Rough concept sketches are initial drawings used to explore clothing ideas.
A fashion designer might draw several variations of a dress neckline, sleeve or silhouette before choosing a direction.
These sketches do not need fully developed faces, shading or fabric rendering. Their main purpose is to record and compare ideas.
2. Fashion Figure Sketches or Croquis
A croquis is a figure template used as a foundation for drawing clothing.
The body can be drawn in a standing pose, walking pose or another position depending on the design being presented.
Fashion croquis often use stylised proportions to emphasise the garments and their silhouettes.
Learning to create different croquis figures can also help designers illustrate clothing for different body shapes and poses.
The University of the Arts London provides tutorials on developing individual fashion drawing templates rather than relying entirely on standardised figures.
3. Technical Fashion Sketches or Flat Drawings
A technical flat sketch represents a garment without a posed human figure.
Flat sketches commonly show front and back views and can communicate details such as seams, darts, collars, cuffs, pockets, closures and stitching.
They are generally more precise and less expressive than editorial fashion illustrations.
A technical sketch helps communicate design information to people involved in garment development. However, a sketch alone may not include all the measurements, materials, construction details and specifications required for production.
4. Finished Fashion Illustrations
A finished fashion illustration develops an idea into a more complete visual.
It may include a styled figure, fabric movement, colour combinations, decorative details, shadows and accessories.
These illustrations can be useful for fashion presentations, portfolio projects and visual storytelling.
5. Digital Fashion Sketches
Digital fashion sketches are created with drawing applications or vector design software.
Artists can work with layers, modify colours, refine outlines and experiment with different presentation styles.
Digital drawing does not remove the need to understand proportions, silhouettes or garment construction. It simply provides additional ways to create and edit artwork.
How to Draw Fashion Design Sketches Step by Step
Beginners can follow the process below to create a fashion design sketch.
For your first drawing, choose a simple garment such as an A-line dress, straight trousers or a basic shirt. Working with a familiar silhouette makes it easier to concentrate on the drawing process.
Step 1: Choose a Clothing Design and Reference
Start by deciding what you want to sketch.
For example, you might draw a sleeveless dress with a fitted waist and flared skirt.
Look at actual garments, photographs or clothing samples to understand the shape and structure.
Pay attention to the neckline, waistline, garment length, sleeves and fabric.
If you are creating an original design, use references to study garment construction and movement rather than copying another designer's complete work.
Step 2: Draw a Basic Fashion Figure
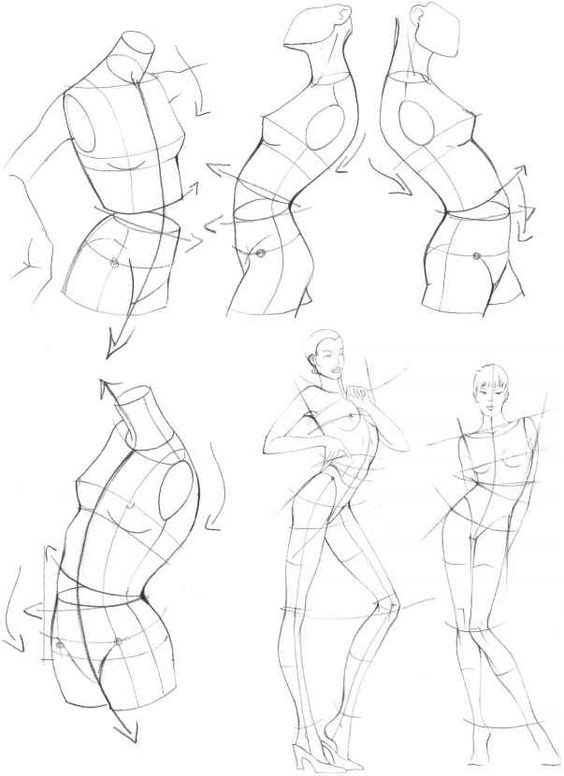
Begin with a light line to establish the figure's height and pose.
Sketch a simple head shape, then mark the shoulders, torso, hips, arms and legs.
Use basic geometric shapes and guidelines instead of trying to draw detailed anatomy immediately.
Keep the construction lines light because you may need to adjust them.
You can begin with relatively natural proportions before experimenting with elongated fashion figures.
Step 3: Establish the Pose and Body Balance
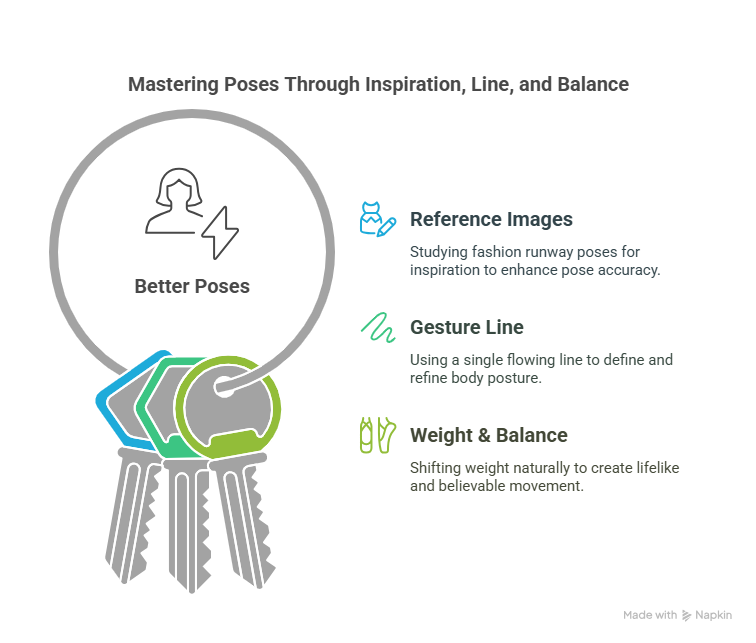
Decide whether the figure will stand straight or have a more dynamic pose.
For a simple standing figure, draw a vertical balance guideline.
For a figure placing more weight on one leg, observe the position of the hips, shoulders and supporting foot.
A curved gesture line can help establish the overall flow of a pose.
The purpose is to create a believable foundation for the clothing rather than perfectly reproduce every anatomical detail.
Step 4: Draw the Clothing Silhouette
Sketch the outer shape of the garment over the figure.
For an A-line dress, begin at the shoulders, outline the bodice and gradually widen the skirt below the waist.
Focus on the overall shape before adding smaller details.
Consider how the design fits the body:
- A fitted garment follows the body's contours more closely.
- A loose garment leaves more space between the body and fabric.
- A structured garment may maintain sharper edges.
- A flowing garment may create softer or more irregular contours.
The silhouette should help the viewer understand the garment even before colour or shading is added.
Step 5: Add Important Garment Details
Once the silhouette is clear, draw the garment's construction and design features.
These might include a neckline, collar, sleeves, seams, pockets, pleats, gathers, waistband, buttons or zip placement.
Do not add details simply to make the sketch look complicated. Include features that are relevant to the garment you want to communicate.
If a detail is difficult to see in the full-body sketch, you can create a separate enlarged drawing.
Step 6: Draw Fabric Folds and Movement
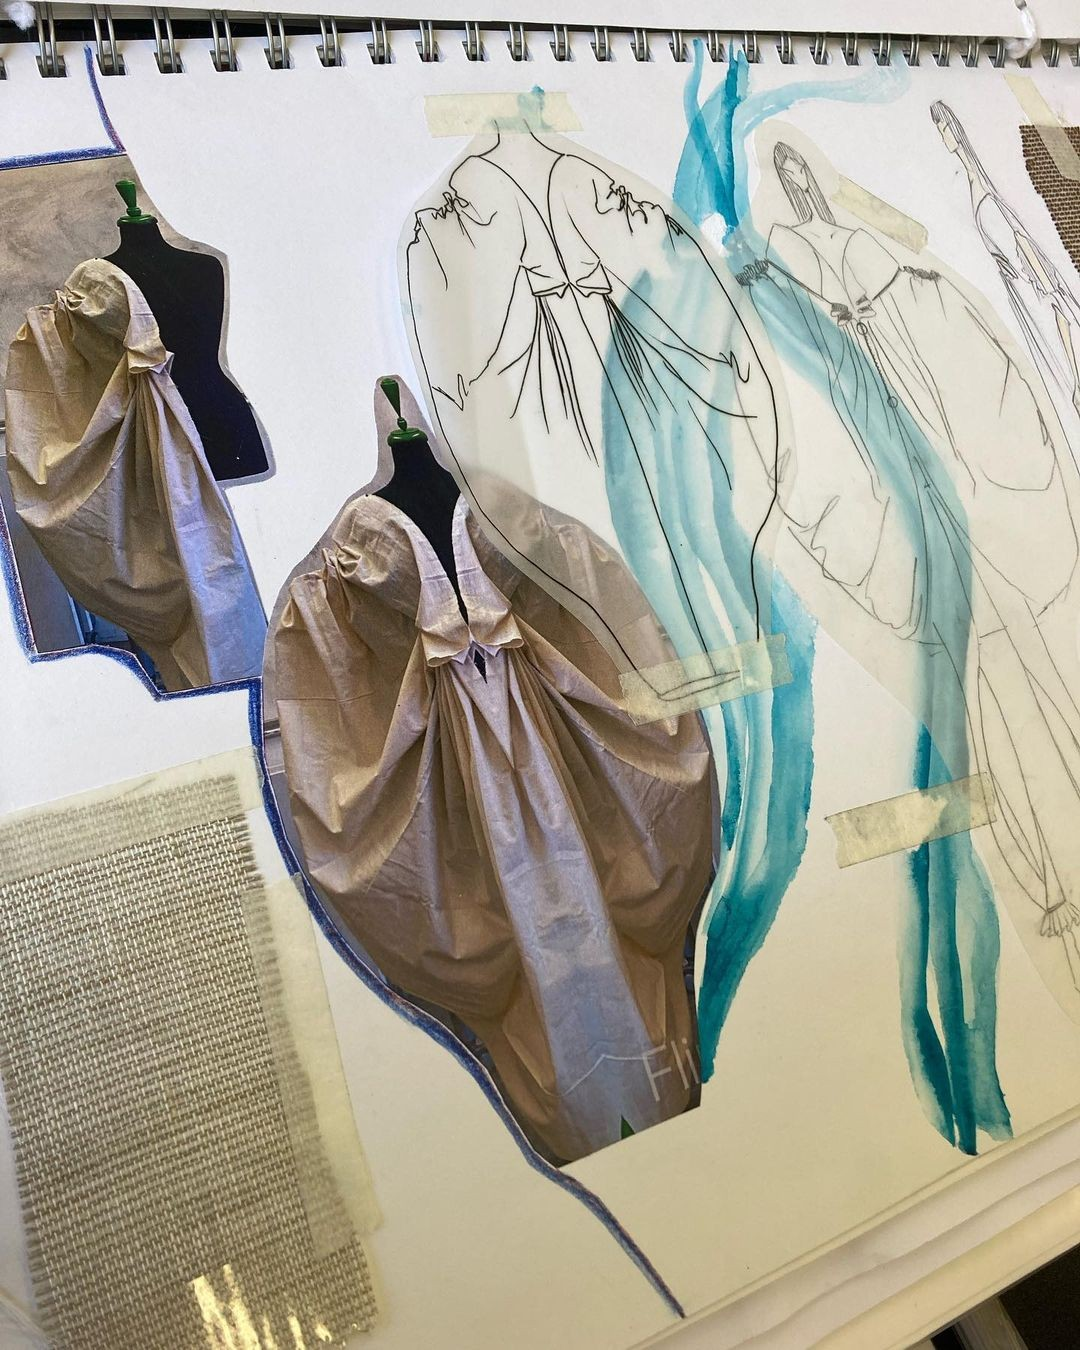
Observe how fabric hangs from the body and responds to movement.
Fabric folds are influenced by factors including material properties, gravity, body position and areas where the fabric is supported or compressed.
For example, folds may develop near elbows, waistlines, shoulders and gathered seams.
Study a real garment to see where folds form. Avoid scattering random curved lines across the illustration.
A few carefully placed folds can communicate shape more clearly than excessive detailing.
Step 7: Add Colour, Shading and Texture
Decide whether your sketch needs a simple colour indication or a more developed illustration.
Begin with the main garment colours, then add shadows and highlights where useful.
For printed or textured fabrics, observe the actual pattern and how it changes across folds.
Consider using stronger contrasts only where they help communicate fabric depth, construction or the focal point of the design.
Step 8: Clean Up and Review the Sketch
Review the garment's overall silhouette and important details.
Ask yourself:
- Is the clothing design easy to recognise?
- Does the garment appear to sit correctly on the figure?
- Are the proportions intentional and consistent?
- Can the viewer identify important garment features?
- Would a front or back view communicate the design more clearly?
Erase unnecessary construction lines and strengthen the final outline where appropriate.
You now have a fashion design sketch that can be refined further, developed into a technical drawing or included in a design presentation.
Understanding Fashion Figure Proportions: The 9-Head Croquis
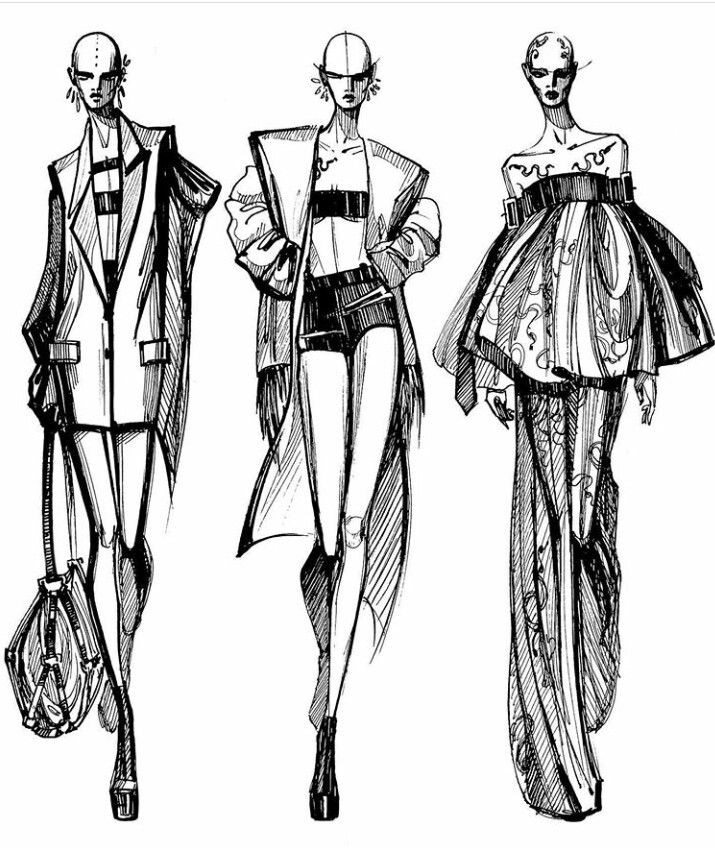
Fashion illustration frequently uses elongated figure proportions, but there is no single proportion rule that every illustrator must follow.
The 9-head proportion is a commonly taught fashion drawing convention. In this approach, the overall height of the illustrated figure is measured as nine times the height of its head.
For example, if the head is 2 cm tall in your drawing, the total figure height would be approximately 18 cm.
Other illustrations may use eight-head, ten-head or more exaggerated proportions depending on the desired style.
Adobe's fashion illustration guide discusses the use of elongated figures, including nine- and ten-head approaches.
How to Create a Simple 9-Head Croquis
- Draw a vertical guideline and divide it into nine equal units.
- Use the first unit to establish the head.
- Lightly sketch the shoulders, torso and hip structure.
- Establish the remaining figure using reference images and proportion guides.
- Add arms, hands, legs and feet.
- Check the figure's overall balance and refine its pose.
- Draw the garment over the completed figure.
The nine equal units measure the figure's total height. They should not be treated as a rigid set of anatomical landmark positions that apply to every drawing style.
Is the 9-Head Rule Compulsory?
No.
The nine-head system is a stylisation technique, not a requirement for accurate fashion illustration.
If your goal is to show how clothing looks on a particular body type, a more representative figure may be appropriate.
If you are developing an expressive editorial illustration, an elongated croquis may suit your presentation.
An important skill is learning to choose proportions according to the design and its purpose.
Essential Tools for Fashion Sketching
You do not need to purchase every drawing tool when starting out.
A basic sketching setup is sufficient for practising figures, silhouettes and garment details.
Traditional Fashion Sketching Tools
The ideal paper and colour materials depend on the technique being used. For example, some markers require suitable paper to reduce bleeding.
The University of the Arts London's fashion drawing tutorial includes tracing paper, pencils, markers and visual references among its suggested materials.
Digital Tools for Fashion Illustration
Different digital tools serve different purposes.
Adobe Illustrator: Useful for vector-based garment illustrations, precise outlines and technical flat sketches.
Adobe Fresco: Supports drawing and painting techniques, including digital brushes and mixed drawing styles.
Procreate: A digital drawing application used for sketching, illustration, colour and brush-based artwork on compatible devices.
CLO: A specialised application for creating and visualising three-dimensional garments. It serves a different purpose from traditional two-dimensional fashion illustration.
Beginners should choose software based on what they want to produce rather than assuming one application is necessary for every fashion design workflow.
For traditional drawing, you can begin without any digital application.
How to Sketch Different Types of Clothing
Each garment has a different silhouette and construction. Understanding these differences makes fashion sketches more informative.
How to Draw a Dress Sketch
Start with the figure and establish the dress's neckline, bodice, waistline and skirt length.
For a fitted dress, observe how the garment follows the torso and hips. For a flared dress, draw the skirt widening away from the waist or hip area.
Add design details such as sleeves, panels, pleats or gathers when they are part of the garment.
For practice, draw the same dress with three silhouettes: straight, A-line and flared.
How to Draw a Shirt or Top
Begin with the shoulders, neckline and torso.
Draw the garment's outer shape, then add the collar, sleeves, cuffs and hem.
For buttoned shirts, mark the centre-front opening and button placement.
Check sleeve proportions and the way the fabric joins at the armhole.
Try sketching the same shirt in a relaxed fit and a more fitted shape.
How to Sketch Trousers or Jeans
Establish the waist, hip area and leg positions.
Decide whether the trousers are straight, wide-leg, tapered or another silhouette.
Draw the outer leg shapes, crotch construction and hems, then add relevant details such as pockets, seams or a waistband.
Use a clothing reference to understand how folds form around the knees, hips and ankles.
How to Draw a Fashion Gown
Begin with the overall silhouette and identify the focal point of the design.
A gown may use a fitted bodice, voluminous skirt, asymmetric draping, a train or decorative panels.
Draw the major shapes before small embellishments.
When illustrating long fabrics, study how the material falls, gathers and interacts with the floor.
How to Sketch Traditional Indian Outfits
Fashion sketches can also be used to develop garments such as sarees, lehengas, kurtas, anarkalis and other Indian clothing styles.
For a saree illustration, pay attention to the drape, pleats, pallu position and blouse design.
For a lehenga, establish the skirt's silhouette, waistband and overall volume. Then add features such as panels, embroidery placement or borders.
For an anarkali, study how the fitted upper portion transitions into the flared lower section.
Referencing actual garments is especially important when drawing regional dress styles or specific textile traditions.
How to Show Fabric Texture in Fashion Illustration
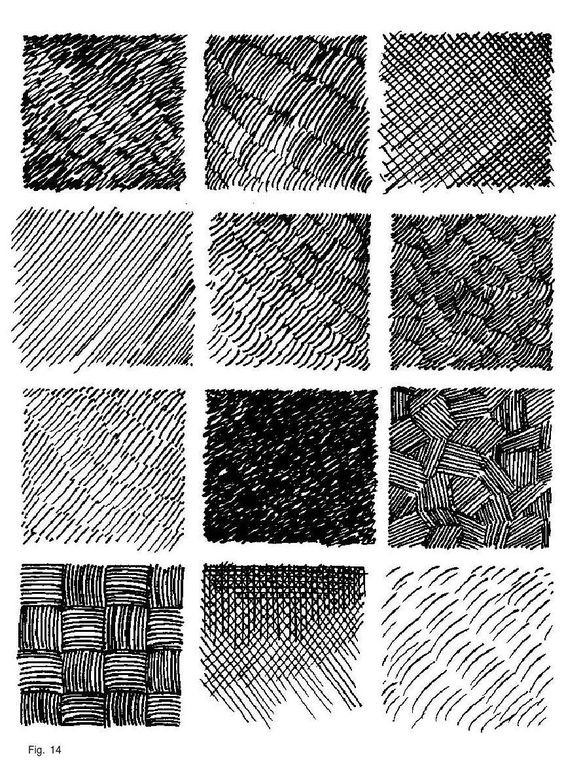
Fabric illustration involves communicating more than a garment's colour.
A convincing sketch should give the viewer some understanding of the material's surface and behaviour.
Here are examples of visual approaches that can be explored.
These are starting points, not fixed rules. The same fabric category can behave differently depending on weave, weight, finish, cut and garment construction.
For greater accuracy, study fabric swatches or photographs under consistent lighting.
How to Draw Fabric Folds More Naturally
Look for where the material is supported, pulled, compressed or allowed to hang freely.
Start with the largest fold shapes.
Use shading to distinguish raised areas from recessed areas, but avoid making every fold equally dark.
Check that the folds follow the garment's structure.
When uncertain, observe an actual garment in the same pose rather than inventing details.
Fashion Sketching Techniques That Help Beginners Improve
Use Gesture Drawing
Gesture drawing focuses on a figure's overall movement and direction before small anatomical details are added.
Try making short sketches from different poses.
Use simple lines to describe posture and movement, then develop the figure further.
Practise Contour Drawing
Contour drawing helps you observe the edges and shapes of garments.
Choose a clothing photograph and focus on drawing its major outlines.
Pay attention to negative spaces, sleeve openings, hems and the relationship between different shapes.
Experiment With Line Weight
Line weight refers to the thickness or darkness of a line.
Different line weights can help distinguish major silhouettes, seams, folds and smaller decorative details.
Try keeping construction lines light and using stronger lines for the completed design.
Work From Real References
Photographs, mannequins, garments and fabric swatches can help develop observation skills.
Look at clothing from the front, back and side.
Study the difference between how a garment appears when laid flat and how it hangs on a body.
Draw the Same Garment More Than Once
Repetition lets you compare different design choices.
For example, sketch a shirt with three collar styles or a skirt with different lengths and volumes.
This develops both drawing practice and design exploration.
Common Fashion Sketching Mistakes and How to Correct Them
Mistake 1: Adding Details Before Establishing the Silhouette
A sketch may have buttons, embroidery and colour but still lack a clear overall form.
What to do: Begin with the garment's shape, then add construction and decoration.
Mistake 2: Treating Stylised Proportions as Realistic Anatomy
Fashion figures can be intentionally elongated, but exaggerated proportions do not represent every real body.
What to do: Learn from human references and decide deliberately when to stylise a figure.
Mistake 3: Drawing Fabric Folds Without Reference
Random folds can make the material look disconnected from the pose.
What to do: Observe where fabric hangs, bends or gathers.
Mistake 4: Confusing Artistic Illustrations With Technical Drawings
A dramatic fashion illustration may communicate a design's mood but leave important construction features unclear.
What to do: Create a separate technical flat drawing when precise garment details need to be communicated.
Mistake 5: Using Too Many Drawing Tools at Once
Beginners may spend time experimenting with software and materials before learning basic drawing techniques.
What to do: Start with a manageable selection of tools and expand as your drawing goals become clearer.
Mistake 6: Depending Entirely on Premade Croquis
Templates are useful, but using only one figure may limit the range of garments, poses and bodies you learn to draw.
What to do: Practise creating original fashion figures alongside using templates.
Fashion Sketch Ideas for Beginners
If you are unsure what to draw, begin with familiar garments and gradually introduce more complex shapes.
Here is a suggested set of practice activities.
Try drawing the same design from more than one angle when it would help explain the construction.
A Simple 7-Day Fashion Sketching Practice Plan
This is an optional beginner practice routine, not a scientifically established timeframe for mastering fashion illustration.
Day 1 - Basic shapes and figure outlines
Draw simple figures using guidelines and geometric shapes.
Day 2 - Fashion croquis
Create standing figures and experiment with different proportions.
Day 3 - Clothing silhouettes
Draw basic dresses, skirts, shirts and trousers without detailed shading.
Day 4 - Garment construction details
Practise collars, sleeves, pockets, waistbands and seams.
Day 5 - Fabric studies
Observe folds and shading in different materials using real references.
Day 6 - Colour and presentation
Add a consistent palette, selected textures and useful annotations.
Day 7 - Complete outfit illustration
Create one finished fashion sketch and, if relevant, a corresponding front-and-back flat drawing.
Review the work at the end of the week to identify which skills require further practice.
How to Create a Fashion Design Sketch Portfolio
A fashion sketch portfolio presents selected work that demonstrates your drawing ability, design thinking and approach to visual communication.
The content should match its intended purpose, such as a course application, design project or professional opportunity.
A useful beginner portfolio may include:
- Original fashion figure and croquis studies.
- Rough concept sketches showing different ideas.
- Completed fashion illustrations.
- Front and back garment drawings.
- Fabric, texture and colour studies.
- A small coordinated clothing collection.
- Selected sketches showing how a design developed.
You do not need to include every drawing you have made. Select work that clearly demonstrates your abilities.
Where helpful, add short notes explaining the concept, design choices and development process.
How Is Fashion Illustration Used in Fashion Design?
Fashion illustration can support different stages of the design process.
During early concept development, sketches help a designer explore multiple ideas.
As the concept develops, more detailed drawings can communicate silhouettes, colourways and garment features.
Technical flat drawings can provide clearer garment information for further development.
Illustrations may also be used in portfolios, design presentations, marketing and editorial projects.
However, a fashion illustration is not a substitute for every aspect of fashion design. Pattern development, fit assessment, material selection, sampling and construction require additional skills and processes.
How Can Beginners Learn Fashion Illustration?
Beginners can start by practising basic drawing techniques independently.
Free educational tutorials, reference photographs, books and online classes can help with foundational skills.
Structured fashion design education may also offer guided practice, feedback and broader instruction in topics such as garment construction, textiles and design development.
The right learning approach depends on your goals, access to resources and the type of work you want to create.
If you are exploring fashion design as a field of study, you can learn more about the Fashion Design Course at Amor Design Institute.
You can also read: Can I Become a Fashion Designer Without Knowing How to Draw? (confirm the exact published link before adding it to the CMS).
Frequently Asked Questions About Fashion Design Sketches
1. What is a fashion design sketch?
A fashion design sketch is a drawing used to represent a clothing idea. It may show the garment's shape, fit, design details, fabric or overall appearance. Sketches can range from rough concepts to detailed technical illustrations.
2. How do beginners start fashion sketching?
Start with a simple figure or croquis, choose an easy garment, draw its silhouette and add the most important clothing details. Gradually practise proportions, poses, folds and colour.
3. Can I learn fashion illustration without knowing how to draw?
Yes. You can begin by practising basic shapes, proportions, gesture lines and garment outlines. Previous drawing experience can be helpful but is not a prerequisite for starting.
4. What is a croquis in fashion design?
A croquis is a figure template used as a base for drawing clothing. It can represent different poses and body proportions and helps designers visualise how garments appear on a figure.
5. What is the 9-head rule in fashion illustration?
The nine-head rule is an illustrative proportion system in which the figure's total height equals nine head lengths. It is a stylisation technique rather than a compulsory or anatomically universal rule.
6. What tools are needed for fashion design sketching?
Beginners can start with paper, an HB pencil, an eraser and reference images. Other useful tools include coloured pencils, markers, tracing paper and digital drawing software.
7. What is the difference between a fashion illustration and a technical flat sketch?
A fashion illustration can communicate mood, style and the appearance of clothing on a figure. A technical flat sketch focuses more directly on the garment's shape and construction features, often using front and back views.
8. Which software can I use for digital fashion illustration?
Adobe Illustrator, Adobe Fresco and Procreate are examples of software that can be used for different types of digital fashion artwork. The choice depends on whether you need vector drawings, expressive illustration or other drawing features.
9. How can I make fashion sketches look more professional?
Focus on clear silhouettes, intentional proportions, accurate garment details, consistent line work and appropriate fabric representation. Choose a presentation style that suits the purpose of the drawing.
10. Are fashion design sketches drawn by hand or digitally?
Both methods are used. Fashion design sketches can be hand-drawn, digitally created or developed using a combination of traditional and digital techniques.
11. How long does it take to learn fashion sketching?
There is no universal timeframe. Progress depends on previous experience, practice, feedback, the techniques being learned and the level of skill a person hopes to achieve.
12. Do fashion designers need to know technical drawing?
Technical drawing is useful when communicating garment features and construction information. The amount of technical drawing required depends on a person's role and responsibilities within the design process.
Conclusion
Fashion design sketching is a practical and creative way to explore clothing ideas and communicate design decisions.
Beginners can build their skills by starting with simple figures and garment silhouettes, then progressing to poses, construction details, fabric rendering and more developed illustrations.
The most useful fashion sketch is not necessarily the most decorative one. It is the drawing that communicates its intended idea clearly.
Whether you are exploring fashion illustration as a hobby, preparing a design portfolio or considering fashion design education, regular observation, drawing practice and constructive feedback can support your development.
Interested in developing your fashion design knowledge further? Explore the Fashion Design Course at Amor Design Institute to learn more about the institute and its educational offerings.
References and Further Reading
- Adobe Creative Cloud - Fashion Illustration Guide. Explains fashion illustration, technical flat sketches, figure proportions, poses, clothing and rendering techniques.
https://www.adobe.com/in/creativecloud/illustration/discover/fashion-illustration.html - University of the Arts London - How to Make Fashion Drawing and Illustration Templates. Published November 25, 2022. Includes guidance from fashion illustration lecturer Ana Stankovic-Fitzgerald on developing croquis templates, gestures and individual drawing styles.
https://www.arts.ac.uk/study-at-ual/short-courses/stories/how-to-make-fashion-drawing-and-illustration-templates - Google Search Central - Creating Helpful, Reliable, People-First Content. Publisher guidance on reliable sourcing, original value, clear authorship and useful content.
https://developers.google.com/search/docs/fundamentals/creating-helpful-content